Reporter tutorial: advanced
This third Reporter tutorial assumes an understanding of the material presented in the Basic and Intermediate Reporter Tutorials. Read through this tutorial in its entirety to gain an advanced knowledge of the Reporter, or select individual lessons for more specific content.
 Create a Report to Use for Tutorial
Let's create a report to use for this advanced tutorial:
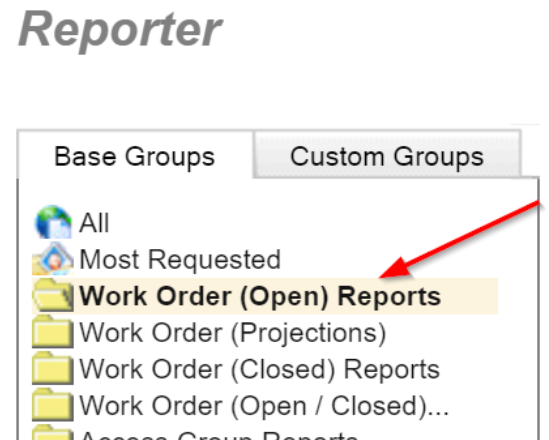
- Open the Report Lookup and select the Work Order (Open) Reports folder on the left:
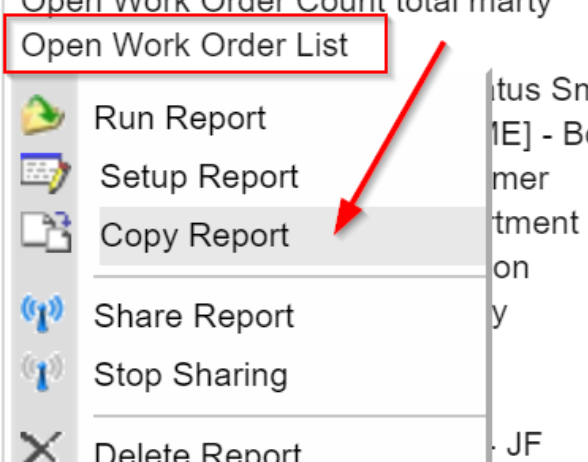
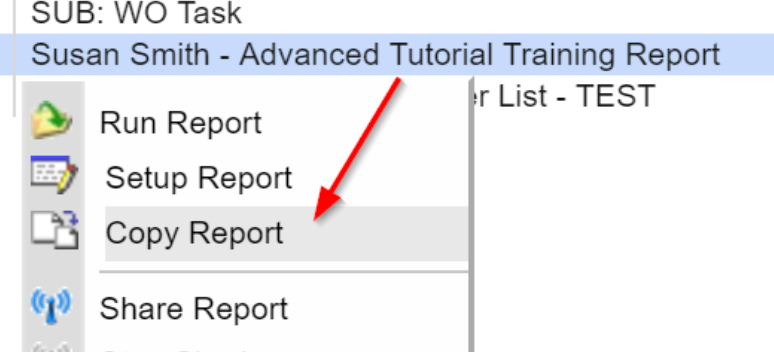
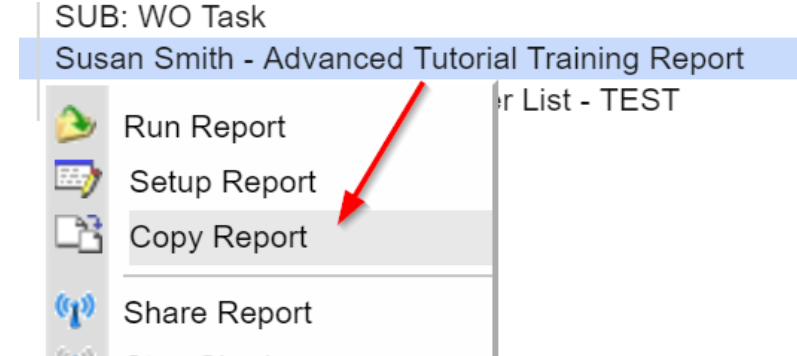
- The Report List on the right will display all reports currently in the selected Work Order (Open) Reports group/folder. Locate the Open Work Order List report and select it. Once it has been selected, click Copy Report (alternatively, you can just right click on the Report Name and select Copy Report):
- The report will open in the Report Copy window, showing standard options for Report Setup. At the top of the window, enter a name for your report, such as "Your Name - Advanced Tutorial Training Report." It is helpful to put the word TEST (or TRAINING) in reports used for training, so that they are easily identified later:
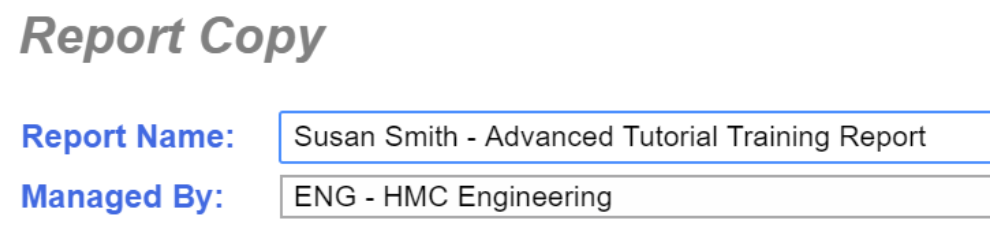
- Specify a Repair Center in the Managed By prompt if the report should only be viewable by a particular Repair Center. To make the report viewable by all, select All Repair Centers. The logged in user's Repair Center will be populated by default.
- Click on the Groups tab, and then the Custom Groups sub-tab. Ensure that this report is designated for inclusion in your desired Report Group. This makes it easier to locate the report in the future:

- Click Apply when you are finished and you will return to the Report Lookup. The new report is likely to display by default, depending on what it was named and the "Managed By" Repair Center to which it was associated. If your new report does not display by default, modify the filters at the top or page through the Report List to locate it.
Custom Expressions
Custom Expressions Tutorial and Library
Custom Expressions can be used to modify the format of a field or perform a calculation. For example, you can calculate elapsed time, such as days open or time taken to respond. You can also use a custom expression to change the display of a field, such as removing the time stamp from a date field, or changing the displayed case (e.g., display all in upper case).
In this tutorial, we will create a custom expression to calculate the number of days the work order has been open. We will then review a reference list of commonly used custom expressions.
Custom Expressions Tutorial: Calculate Days (Open)
Let's modify the report we just copied to include the date the work order was requested and then calculate and display the number of days the work order has been open:
- Locate the report that you just created in Lesson 1, and then select Run Report:

- The Report Criteria window will open. Change any desired criteria and click Apply to present your report in the Report Preview window.
- Click the Setup button on the Reporter Toolbar to access the Report Setup window, on which the custom field can be defined:

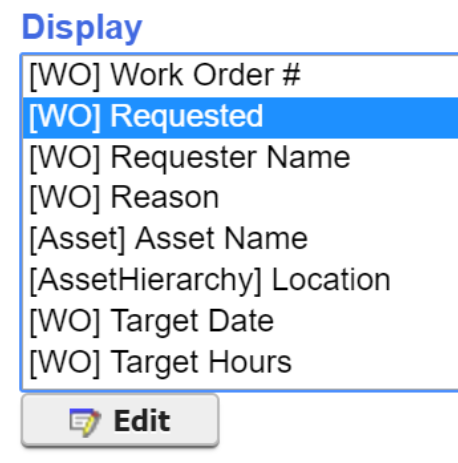
- Since we will be calculating the number of days the Work Order has been open, let's add [WO] Requested to the Display fields list and place it just after the Work Order #:
- To create the calculated field, you must specify a placeholder field on which the calculation will be specified:
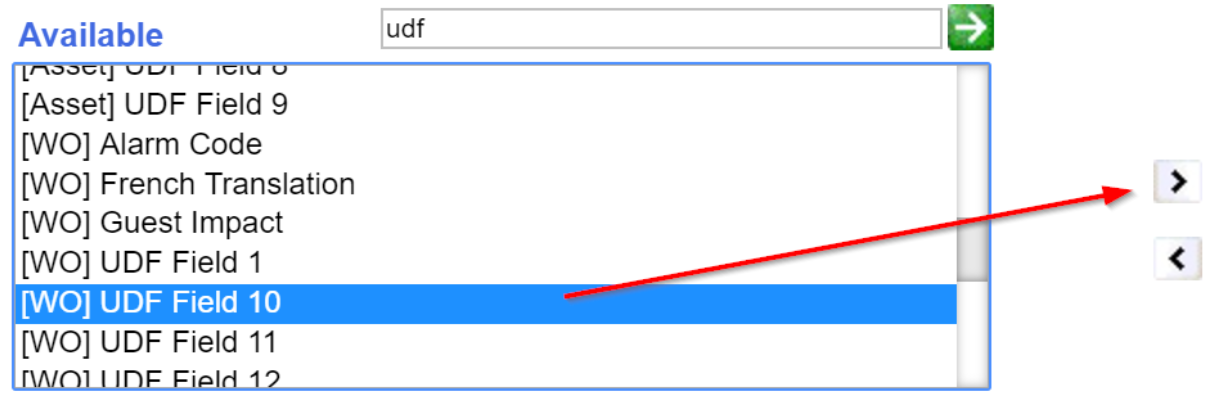
- Select a field from the Available fields list to use as a placeholder. It must be a field that is not already listed in the Display fields list.
- For our example, you could select a UDF field such as [WO] UDF Field 10 and move it to the Display fields list:
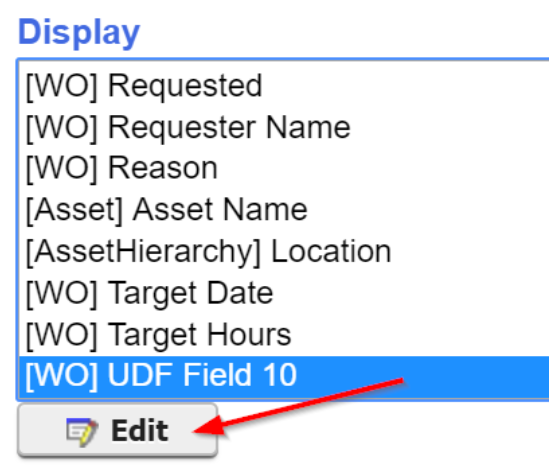
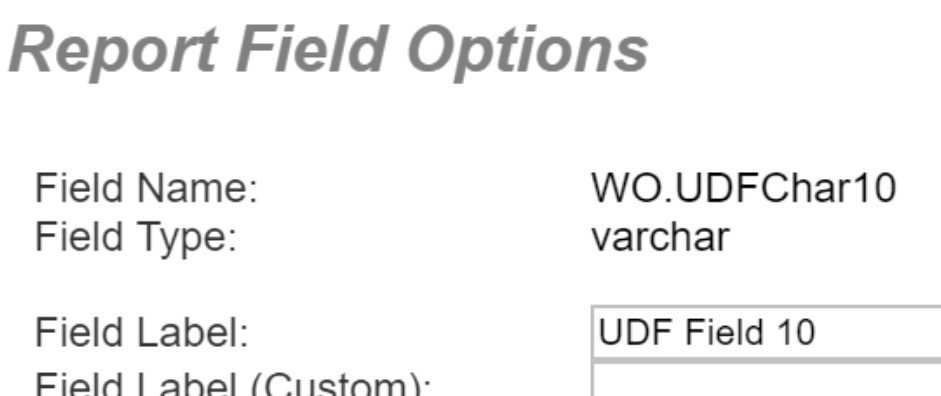
- Select the placeholder field in the Display fields list and click Edit, just below the field list. The Report Field Options dialog will display for this field:
-
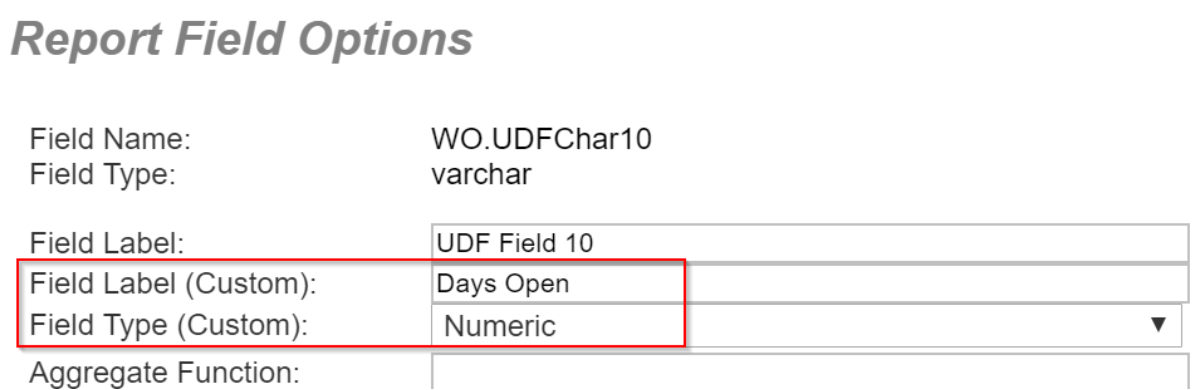
Enter the desired field label for the report column in the Field Label (Custom) prompt. In our example, you could enter Days Open.
- Select the appropriate field type for your calculated result from the Field Type dropdown. In our example, you should select Numeric, as we will be calculating the number of days using this field:
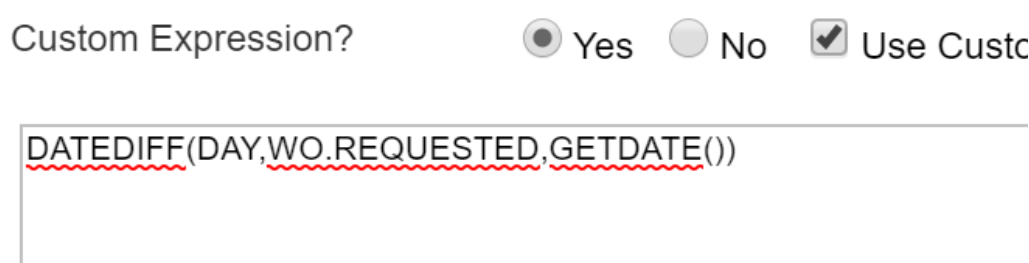
- Click the Yes control in the Custom Expression? field prompt toward the bottom of the dialog, letting the system know that a custom calculation or expression will be used:

- The expression for the calculation must be placed in the Custom Expression Box. In our example, we will create a Custom Expression that calculates the number of days between the current date and the date the Work Order was requested. A function called DATEDIFF is used to calculate elapsed time between dates.
- To tell the system to calculate from today, we must use the expression GETDATE() to signify the current date. The correct expression would be: DATEDIFF(DAY,WO.REQUESTED,GETDATE())\n
- In our example, the custom expression box should appear as follows:
- Click Apply to return to the Report Setup window.
- Use the up/down arrow controls to move the new field just below [WO] Requested:

- To save your changes and view them in the report, click the Apply button at the bottom of the Report Setup window.
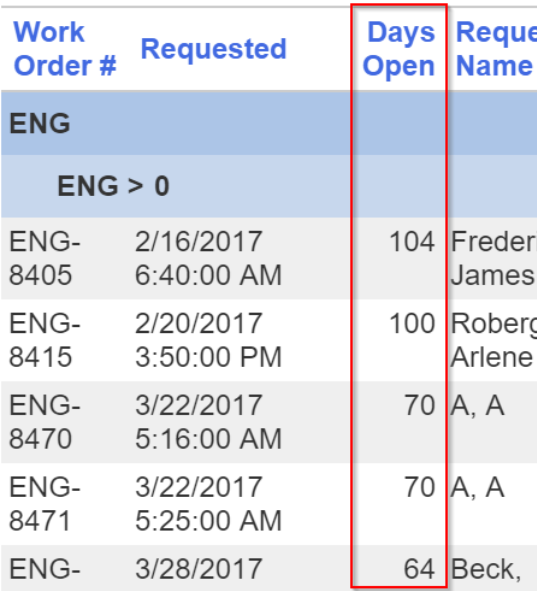
- The new Days Open column might appear as follows:
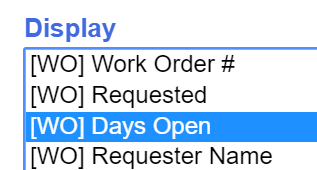
- Return to the Report Setup window and note that once the field properties have been applied, the field will show in the Display fields list with the label you specified:
Library of Custom Expressions
The following chart shows some examples of Custom Expressions that can be used to format field displays or create calculations. It should be noted that Custom Expressions are not case-sensitive. They are listed here in mixed case (e.g., WO.Requested) to make the field names easier to read:
| Description | Expression |
|---|---|
| Upper Case a Field Value | UPPER(WO.Reason) |
| Days to Complete Work Order from Requested Date | DATEDIFF(day,WO.Requested,WO.Complete) |
| Days to Complete Work Order from Issued Date | DATEDIFF(day,WO.Issued,WO.Complete) |
| Days Work Order Open | DATEDIFF(day,WO.Requested,GETDATE()) |
| Weeks Work Order Open | DATEDIFF(week,WO.Requested,GETDATE()) |
| Months Work Order Open | DATEDIFF(month,WO.Requested,GETDATE()) |
| Hours to Issue Work Order | DATEDIFF(hour,WO.Requested,WO.Issued) |
| Minutes to Issue Work Order | DATEDIFF(minute,WO.Requested,WO.Issued) |
| Date Returned without Time Stamp | LEFT(WO.Requested,12) |
| Full Status Returned (Issued/Complete vs. Issued) |
dbo.MC_GetWOStatus(WO.WOPK) |
| Adding two field values together (e.g., Work Order Labor Cost + Work Order Parts Cost) |
WO.CostLaborActual+WO.CostPartActual |
| Conditional Display using CASE Statement (e.g., if work order is past target date, display \"OVERDUE\") |
CASE when WO.TargetDate<GETDATE()THEN 'OVERDUE' ELSE 'ON SCHEDULE' END |
| All the below are added to a placeholder field as a custom expression | |
| Add decimal for all values in field, if it is 1, make it 1.0 | CONVERT(varchar,CONVERT(numeric(9,1), ISNULL(SUM(LaborTimeOff.Hours),0.0))) |
| Average Response Time in Days | AVG(DATEDIFF(day, WO.Requested, WO.Responded)) |
| Calculate 2.5% of a field | CONVERT(varchar,CONVERT(numeric(9,2), ISNULL((Asset.ReplacementCost * .025),0.00))) |
| Calculate a field cost + 2.5% | CONVERT(varchar,CONVERT(numeric(9,2), ISNULL((Asset.ReplacementCost * 1.025),0.00))) |
| Display Only First 3 Characters of Field | LEFT(Asset.AssetID,3) |
| Year Only Returned without Time Stamp | Set the "Field Type (Custom):" to Character. Custom Expression: CONVERT(varchar,WO.Complete,1) |
| Number of Days Overdue - Targeted Work Orders vs Complete |
(DATEDIFF(day,WO.TargetDate,ISNULL(WO.Complete,GETDATE()))) |
| All the below are added to the report's Setup -> Where (SQL) | |
| Previous 24 Hours - Requested Work Orders |
(DATEDIFF(hour,WO.Requested,getdate()) <= 24) |
| Yesterday - Work Orders Requested or Complete - add to Where (SQL) | (DATEDIFF(day,WO.Complete,GETDATE()) <= 1 OR DATEDIFF(day,WO.Requested,GETDATE()) <= 1) |
| Yesterday - Work Orders Requested but when it is Monday, exclude Saturday & Sunday so you get Friday's data | (DATEDIFF(day,WO.Requested,GETDATE()) = (CASE DATEPART(weekday,GETDATE()) WHEN 1 THEN '2' WHEN 2 THEN '3' ELSE '1' END)) |
| Previous 7 Days, excluding today - Targeted Work Orders | (DATEDIFF (day, WO.TargetDate, GETDATE()) between 1 and 7) |
| Previous 7 Days, including today - Targeted Work Orders | (DATEDIFF (day, WO.TargetDate, GETDATE()) between 0 and 7) |
| Next 3 Weeks - Targeted Work Orders | (DATEDIFF(week,WO.TargetDate,GETDATE()) between -3 and -1) |
| Previous 4 Months - Complete Work Orders | (DATEDIFF(month,WO.Complete,GETDATE ()) between 1 and 4 and WO.Complete IS NOT NULL) |
| Previous 2 Years - Complete Work Orders | (DATEDIFF(year,WO.Complete,GETDATE() ) between 1 and 2 and WO.Complete IS NOT NULL) |
| Next Month - Targeted Work Orders | (DATEDIFF(month,WO.TargetDate,GETDATE ()) = -1) |
| Overdue - Targeted Work Orders vs Complete | (WO.IsOpen=0 AND WO.Complete > WO.TargetDate + 1) |
| Ontime - Targeted Work Orders that are Complete | (WO.IsOpen = 1 AND WO.Complete IS NOT NULL AND WO.Complete <= TargetDate +1) |
Lesson 3: Modify Fixed Criteria
Fixed Criteria Tutorial and Examples
When Fixed Criteria have been defined for a report, it is displayed at the top of the Report Criteria window:
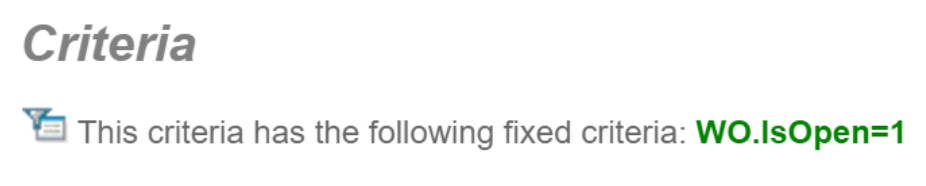
Fixed Criteria to limit Work Order reports to display only open or closed Work Orders is specified for most Work Order reports. For indicators/checkboxes in the system, the acceptable values are always "0" or "1". "0" is used to indicate "false/no," and "1" to indicate "true/yes"
Note: To modify fixed criteria, the Access Group to which you belong must have permission to utilize the Advanced tab in the Reporter.
To demonstrate this feature, we will take an open Work Order report and create a new version that includes both open and closed work orders:
- If you are continuing from Lesson 2, return to the Report Lookup and select the report that was created for this tutorial.
Note: Alternatively, you can use any open Work Order list for this lesson. It is preferable to have a "Days Open" calculation, similar to the one created in the previous lesson.
- With the report highlighted, select the option to Copy Report:
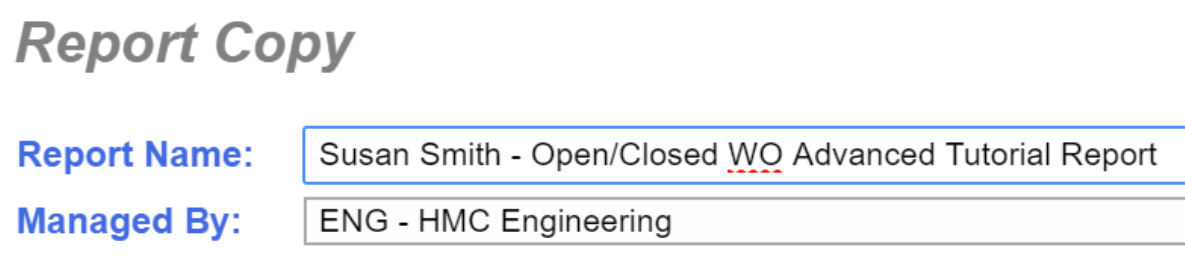
- Change the report name to indicate something similar to the following: "Your Name - Open/Closed WO Advanced Tutorial Report\":
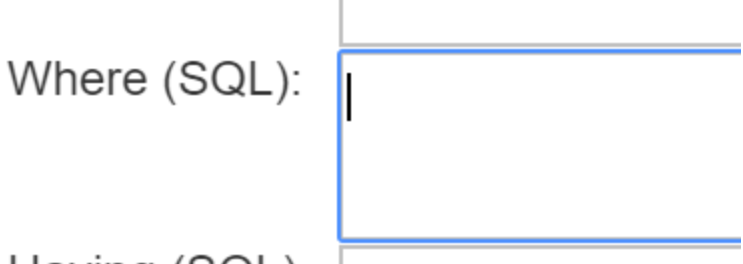
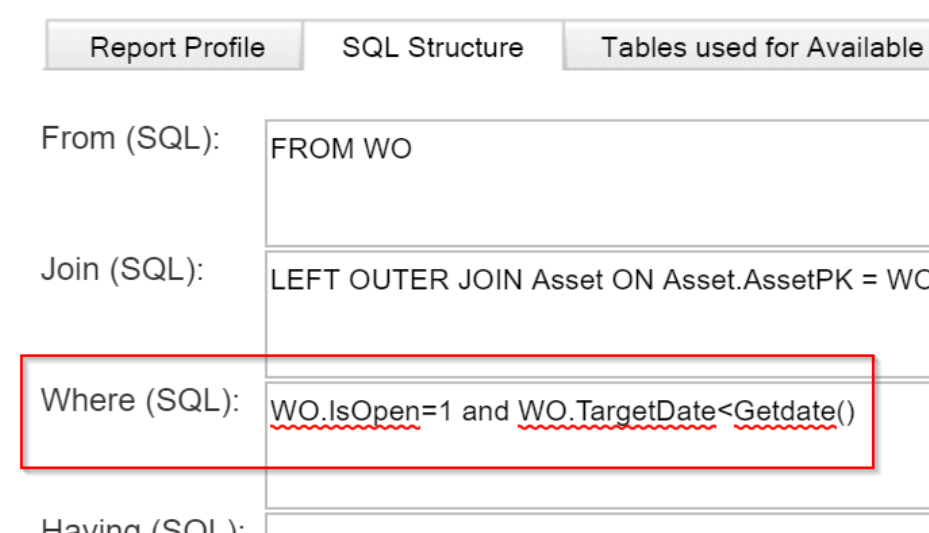
- Select the Advanced tab and then select the SQL Structure sub-tab. If the Advanced tab does not display, your access group does not currently have permission to use this feature. You must contact your System Administrator for assistance:

- The current fixed criteria is displayed in the Where (SQL) section of the page. In the above example, the report has fixed criteria to include only open Work Orders (WO.IsOpen=1). Remove this value so that the report will no longer filter to include only open Work Orders:
- Now that we have changed this to return all Work Orders, we should also move this report into the Work Order (Open/Closed) reports folder:
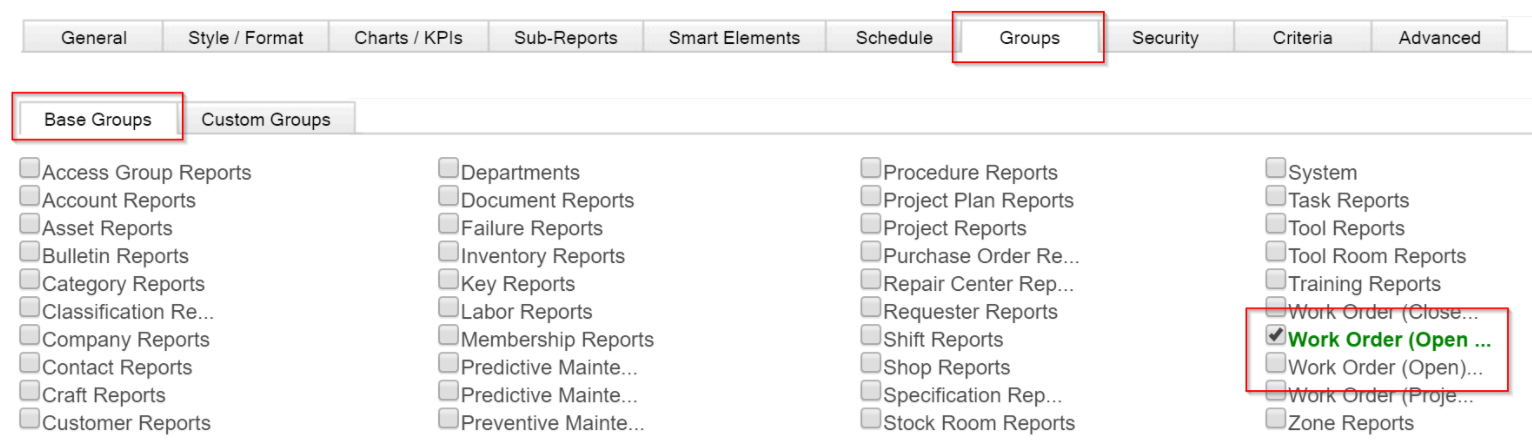
- Select the Groups tab.
- Using the default Base Groups sub-tab, and remove the check from Work Order (Open) Reports
- Add a check to Work Order (Open/Closed) Reports:
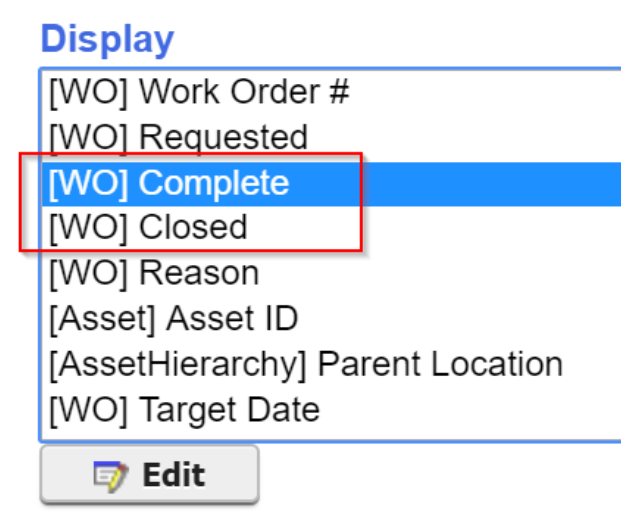
- In the Display fields list at the top of Report Setup window, let's remove the Days Open field, and replace it with the dates the Work Orders were completed and closed. This will make it easier to identify which Work Orders are complete:
- Remove Days Open from the Display fields list.
- Add [WO] Complete to the Display fields list
- Add [WO] Closed to the Display fields list
- Move the fields so they are displayed directly after [WO] Requested
- Your new field list should appear similar to the following:
- Click Apply to return to the Report List and run our newly copied report. Since the report has been moved to the Work Order (Open/Closed) Reports folder, you may need to change the selected Report Group in order to find the report:

- Select the newly copied report and click Run Report.
- With the Report Criteria dialog displayed, enter criteria that will limit the results appropriately for your organization's data. For example, configure the Target Date to be within the Last/Next 3 Months:

- Save your defined criteria and click Apply to open the report in the Report Preview window:

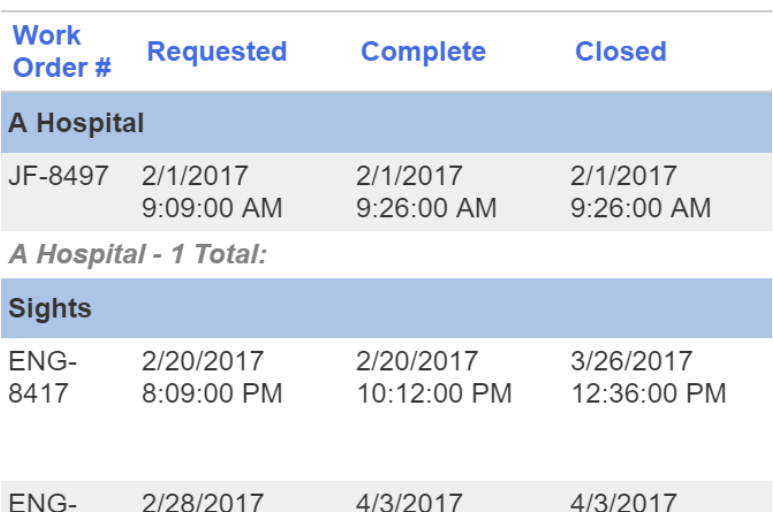
- In viewing the report, you should see both open and closed work orders, with the Complete and Closed dates showing for those Work Orders:
Fixed Criteria Examples
The following list shows examples of fixed criteria that customers have found especially useful. This feature is often used to specify criteria that may be difficult to define using the standard prompts in the Report Criteria dialog.
The examples that are listed below would be entered in the Where (SQL) section of the Advanced>SQL Structure sub-tab:
| Description | Expression |
| On an open Work Order report, show only Work Orders that are overdue | WO.IsOpen=1 and WO.TargetDate<Getdate() |
| On a closed Work Order report, show only Work Orders that took more than 10 days to complete | WO.IsOpen=0 and ProblemID is null |
| On a closed Work Order report, show all Work Orders that have no value in the \"Problem\" field | WO.IsOpen=0 and WOLabor.RecordType=2 |
| On a closed Work Order Labor report, show only \"Actual\" Labor hours (exclude any Estimated Labor hours). Actual Labor records are recorded with a WOLabor.RecordType of \"2\". | WO.IsOpen=0 and WOLabor.RecordType=2 |
Note: As can be seen, fixed criteria typically includes the expression that determines whether open or closed work orders should be displayed.
Editable Smart Reports
Editable Fields Tutorial and How to Widen Editable Fields
Reports can include Smart Actions, allowing users to click on a row/column displayed in a report and have an action occur. You can even use Smart Features to allow editing of report fields from within a report, or updates to status (e.g., Issue work orders).
Note: Editable smart reports are a very powerful feature that can result in unintended consequences if not defined correctly (e.g., the wrong records updated). As such, it is strongly recommended that only data from the primary file (e.g., Work Order data in a Work Order report) be enabled for updating, such as that demonstrated in the following lesson. It is recommended that you obtain the assistance of Maintenance Connection Support prior to creating any editable smart reports of your own.
Editable Fields Tutorial: Edit Target Date
In this lesson, we will demonstrate how to use Smart Actions to edit the defined Target Dates, and then add buttons to change the status of the displayed Work Orders:
- Return to Report Lookup and locate the report you created in Lesson 1 (and modified in Lesson 2).
Note: You can copy any open work order list for this lesson.
- With the report highlighted, select the option to Copy Report:
- Change the report name to indicate something similar to the following: "YourName - Advanced Tutorial Smart Report":

- Click Apply when you are finished and you will return to the Report Lookup. The new report is likely to display by default, depending on what it was named and the Managed By Repair Center to which it was associated. If your new report does not display by default, modify the filters at the top or page through the Report List to locate it.
- Select the newly-created report and click Run Report.
- Click Apply from the Report Criteria dialog to run the report. The Report Preview window will display
- To define our smart actions for this report, select Setup from the Reports Toolbar:

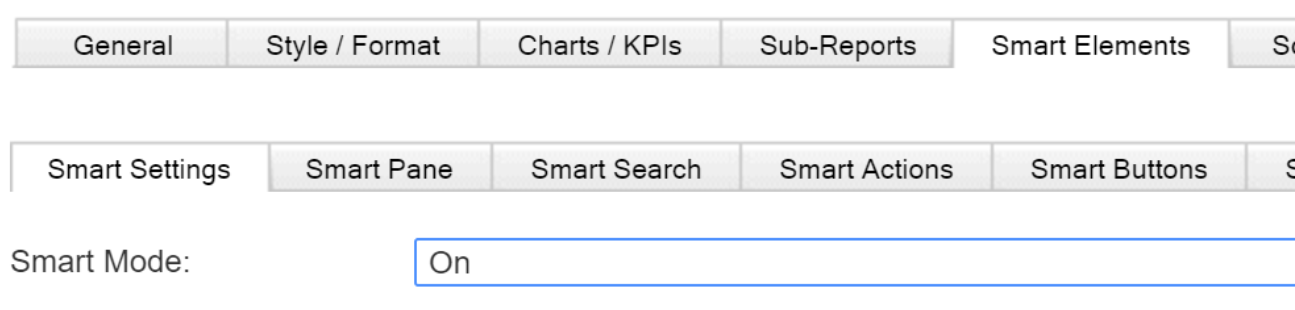
- Click on the Smart Elements tab and turn Smart Mode to On from the default Smart Settings sub-tab:
- Select the Smart Actions sub-tab. From this sub-tab, we can specify the type of smart action to enable.
- To specify that we wish to designate a smart action for a specific column/field, set the Smart Action Type to Column (Multiple Smart Actions per Row). Any remaining prompts on this page will disappear:

- Select the Smart Buttons sub-tab. In order to have an editable report, we must specify that a Save button is needed on the report:
- Select Save from the Smart Button(s) dropdown control.
- The Smart Button Field Value is an extremely important designation, as it defines the relationship that instructs MC as to which tables/records to update. For updates to a primary file (Work Order, Asset), you select the primary field for the record that is shown. For this update to the Work Order record, you should select [WO]WO:

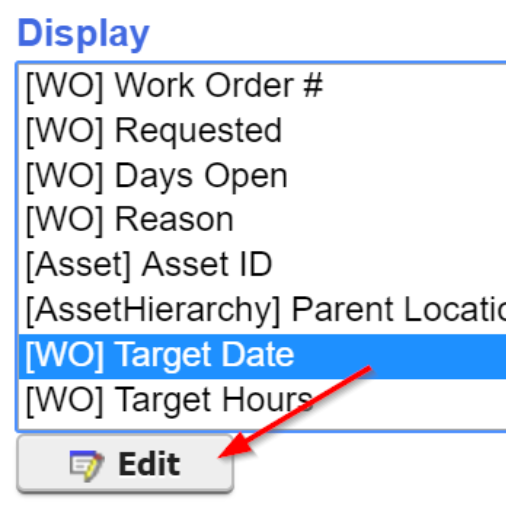
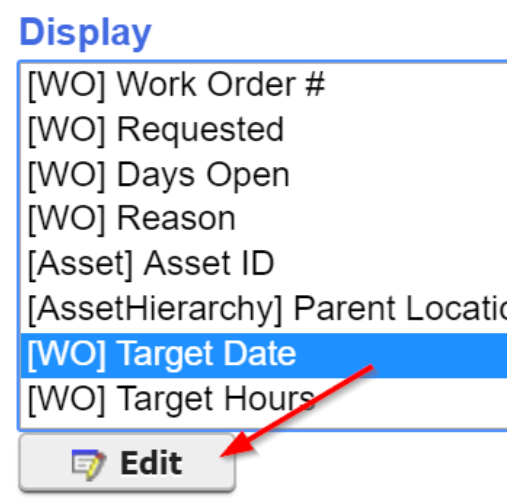
- Now,we can define the field on which we want the edit to be allowed. Let's add the Target Date to this report, so we can define it to be editable. Once you have added the [WO] Target Date field, select it in the Display fields list and click the Edit button:
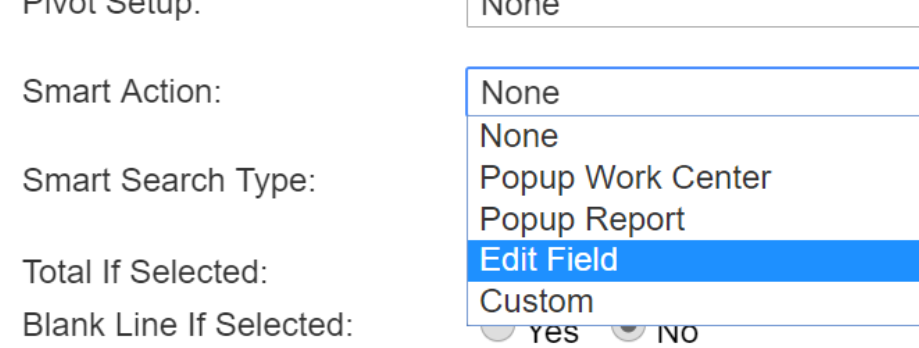
- In the Report Field Options dialog that appears, set the Smart Action control (in the middle of the dialog) to Edit Field:
- An additional field will display, allowing you to enter a Smart Action Tool Tip if desired:

- Click Apply to close the Report Field Options dialog.
- Click Apply again to save your changes and return to the Report Preview window.
- Notice how the Target Date field is now editable, with a Save button displayed to save any updates:
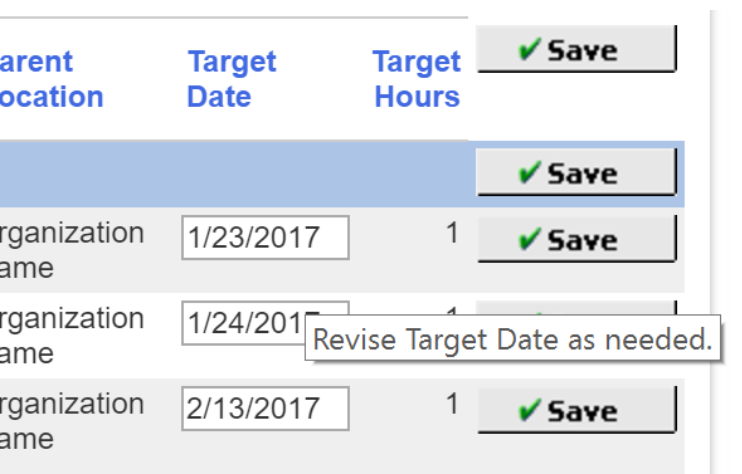
- To modify a date, enter a new date and click the Save button. Notice how the record turns green to let you know that it has been updated:

Tip: The Save button shown in the header row allows changes made to multiple rows to be saved in a single step. After saving, the page refreshes, showing the records that updated correctly in green and highlighting rows with errors in red. It is important to note that this feature saves all records displayed in the report, not just those for which an update has been entered. As such, it is wise to carefully define report criteria when performing a Save All to ensure performance efficiency.
- Return to the Report Setup so that we can add a Smart Action to allow these Work Orders to be issued from the report:

- Return to the Smart Elements>Smart Buttons sub-tab.
- Open the Smart Button dropdown control and notice all the options available to change the status of Work Orders. Select Issue:
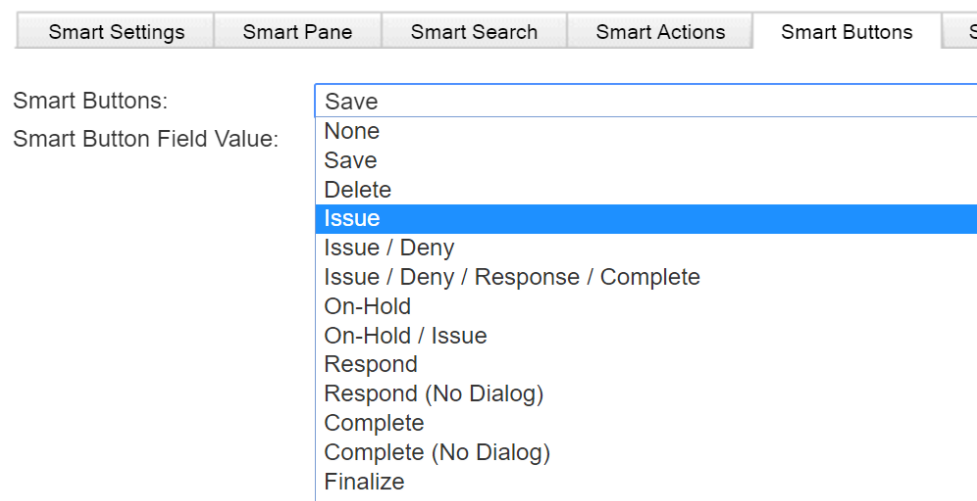
Note: The Smart Buttons dropdown control even includes options to Complete or Close Work Orders. The options can be designated to function with and without the display of the Complete/Close dialog. The "No Dialog" options allow you to complete or close the Work Order without first being presented with the Complete/Close dialog.
- Click the Apply button to return to the Report Preview window. An Issue button now appears at the far right of each row:
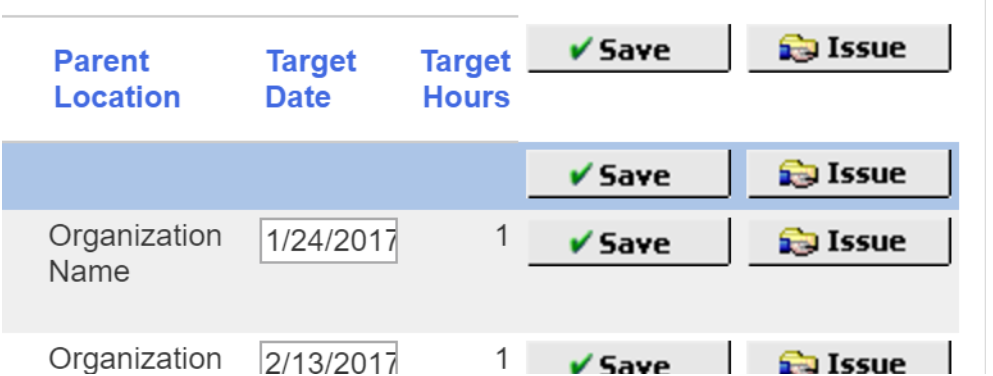
Make Editable Fields Wider
You can see in the screenshot above that, after adding additional columns to the report, the Target Date fields are not wide enough to contain the whole text of the given date. The following steps allow you to make editable text fields wider, making them easier to edit:
- Return to the Report Setup, select the [WO]Target Date field in the Display fields list, and then click the Edit button:
- In the Report Field Options dialog, input "width:###x" into the Format Style field. For this example, we will set the width to 100px:

- The Target Date fields will widen in the Report Preview window to provide for easier editing. Keep in mind that, in editing the column width, you may need to test out several different width values before finding the desired display:

Custom Group Headers
Reports configured to group a specified field show a header (or title) above each grouping, which displays the value in the field. In some cases, this description is not informative enough and an alternative header is desired. The MC Reporter has a feature that allows you to specify a Custom Header. The system includes some default Custom Headers, including some that can be used to aggregate date groupings (by month, day or year).
To demonstrate this feature, let's sort a report by Requested Date, and use a Custom Header that groups by month:
- If you are continuing from Lesson 4, return to Report Setup. Alternatively, access Report Setup for any Open Work Order Report that can be modified for training purposes:

Note: Custom Group Headers are only available on reports that are included in a Base Report Group, such as Work Order (Open) Reports.
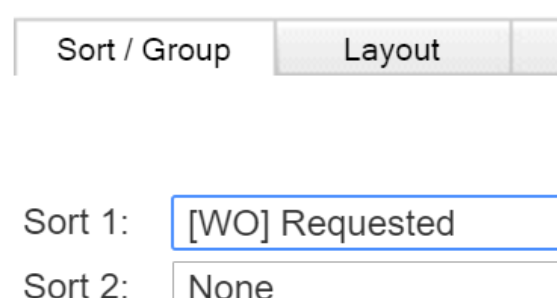
- On the default General>Sort/Group sub-tab, remove any existing sort definition by selecting None for the first sort field:

- Select [WO] Requested for Sort 1:
- Click the Group indicator to ensure the results will be grouped for this sort. Then click the Custom Header indicator to the right:

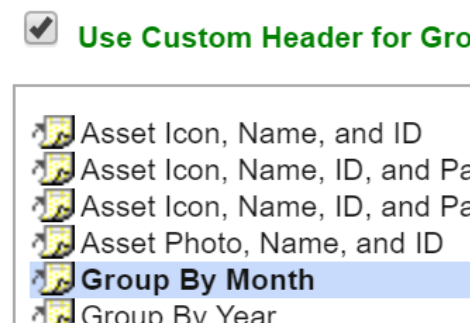
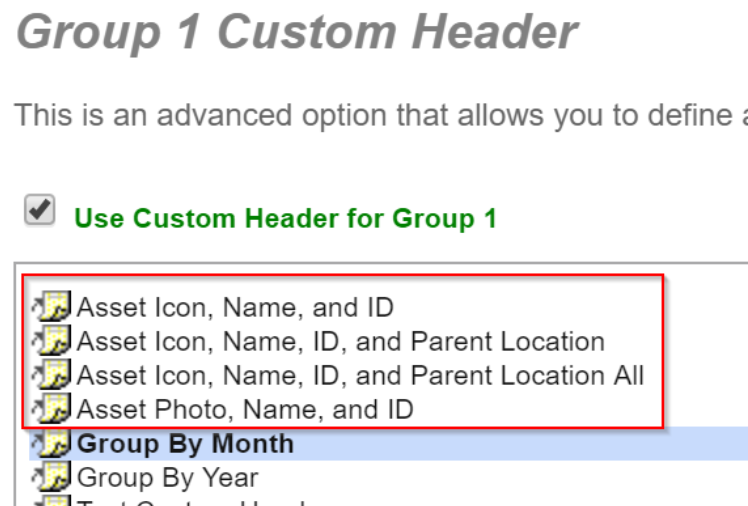
- The Custom Header dialog will display. Click the indicator at the top that says: Use Custom Header for Group 1:
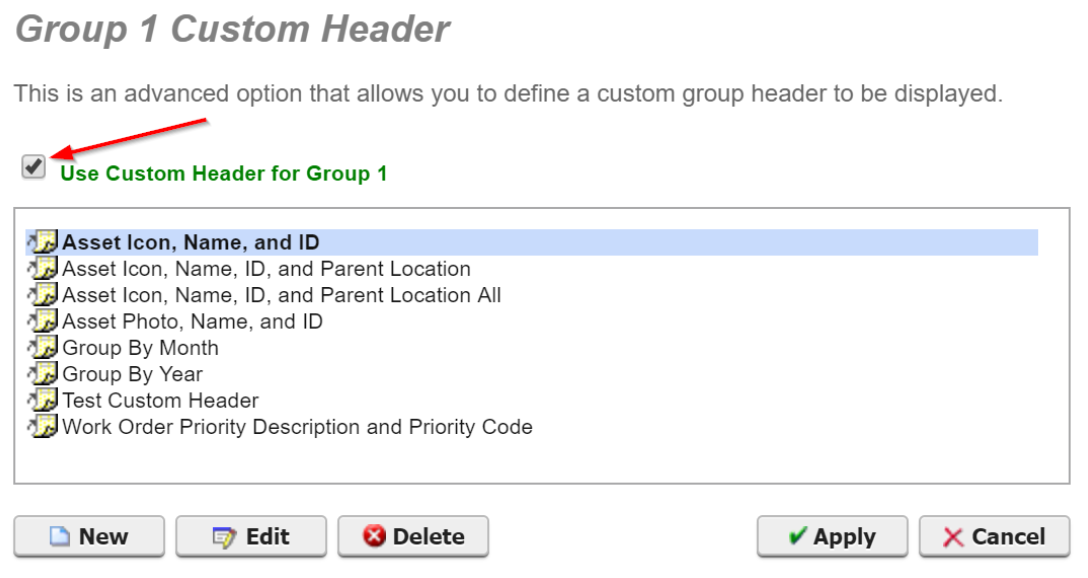
- Select Group By Month:
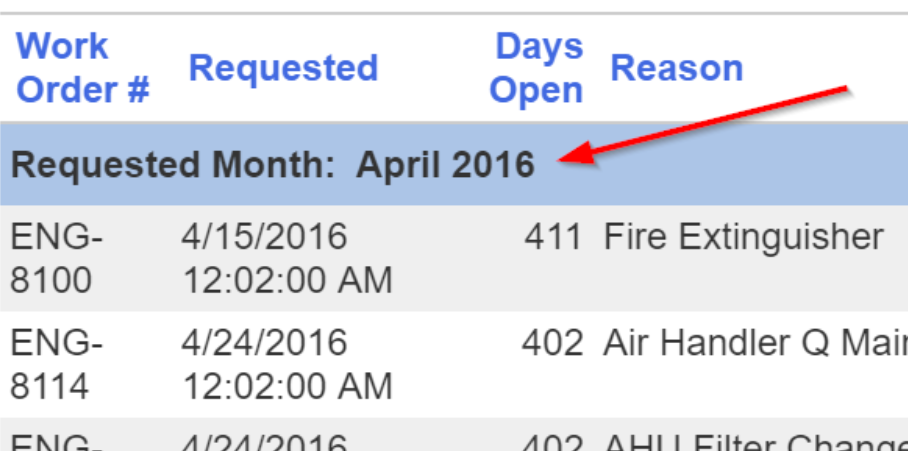
- Click Apply to close the Custom Header dialog. Click Apply again to preview the report. Notice how the records are now grouped by Requested Month, with a header that clearly indicates each month:
- Now let's take a peek at a valuable charting feature that is available when a custom header is used to group by a date aggregation (such as our Group by Month example). Return to Report Setup and select the Charts/KPI tab.
- Modify the existing chart display (or create a new one), as follows:
- Select Bar Chart as the Type, and Flash as the Format
- Select Automatic (Sort 1) as the Chart By field, instructing the Reporter to chart by our Sort 1 definition (Requested By Month)
- Select Count as the Chart Function
- Enter a desired name for the Chart Name:
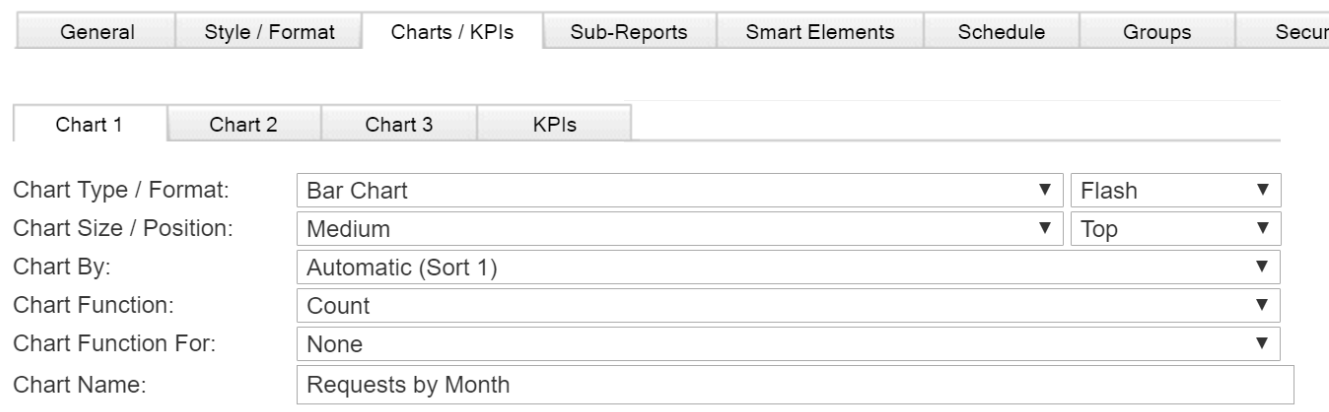
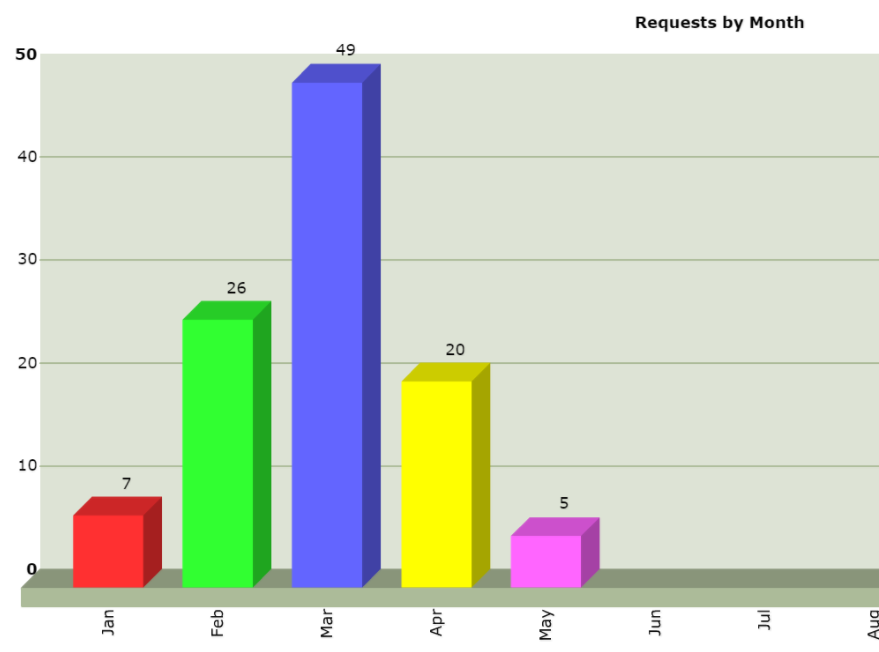
- Click Apply to return to the Report Preview window and note how the chart displays a count of Work Order requests by month:
Tip: The Custom Header dialog includes predefined options that are especially helpful when reports are grouped by Asset (e.g., showing Icon, Name, ID and Parent):
Note: Users with experience working with HTML can use the options in the Custom Header dialog to create their own custom headers.
Lesson 6: Enlarge Images in Reports
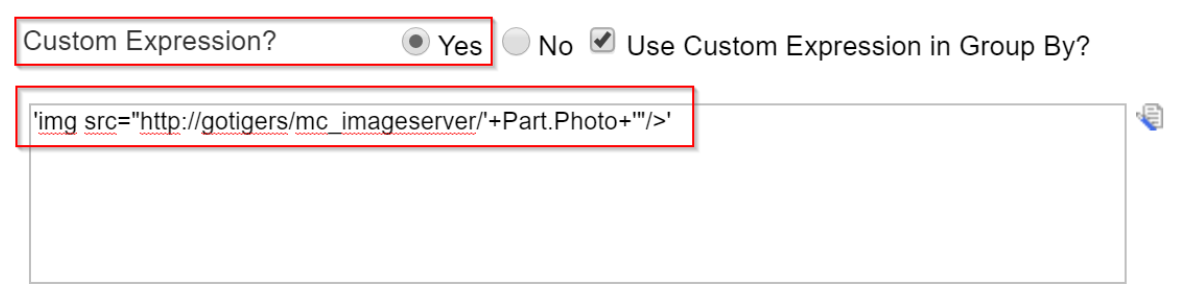
Whenever images are added to reports, they appear by default as thumbnails, and not as full size images. The process shown here explains how to enlarge images on reports by adding a Custom Expression to build the HTML image tag. In this example we will be adding full size images to an Inventory report. The template Custom Expression we would use for this Report is as follows:
'<img src=\"http://<<SERVER NAME or DNS>>/mc_imageserver/'+Part.Photo+'\"/>'
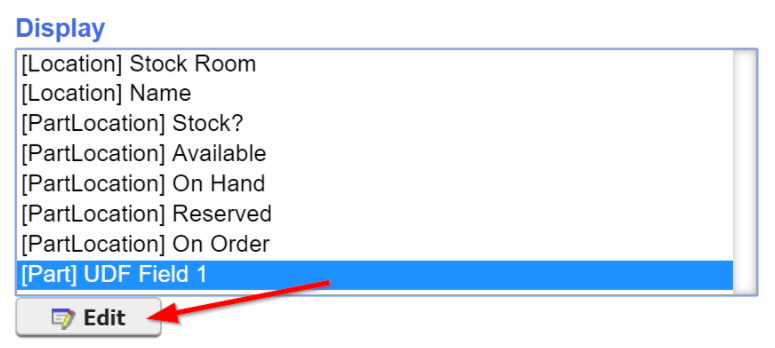
- We will need to add this Custom Expression to any available character field, such as [Part] UDF Field 1. Begin in the Report Setup by selecting this field in the Display fields list, and clicking the Edit button:
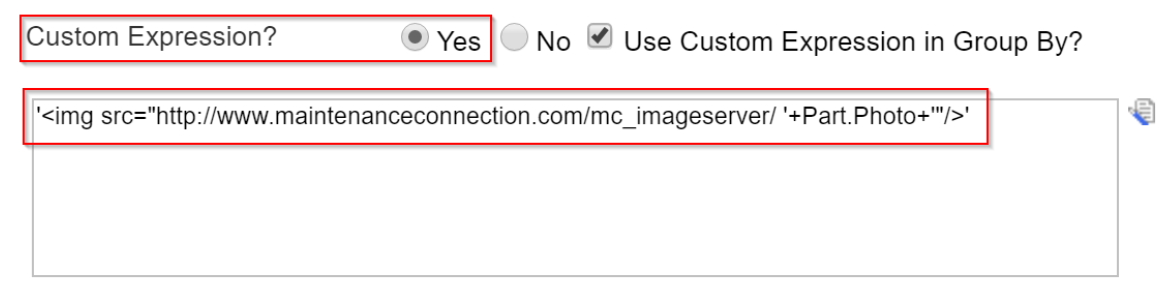
- We can now add the template above into the Custom Expression textbox. You will need to replace <<SERVER NAME or DNS>> with the name of your server or with the DNS entry you use.
- If you have a Cloud Hosted database, you would enter the Custom Expression shown and ensure the Yes button is selected for the Custom Expression:
- If you have an On Premise database, you will need to add your server name. To find this, look at the URL on your login page and use everything before "/mc_web/...":

- So, for the URL shown above, you would input the Custom Expression shown here:
- Keep in mind that you can also adjust the size of the image by using the IMG tag attributes. For example, the following expression would adjust the width of the image:
'<img src=\"http://www.maintenanceconnection.com/mc_imageserver/'+Part.Photo+' width=\"500px\"/>'
- Now, when you run the Report, the image should appear as it was defined in the Custom Expression:
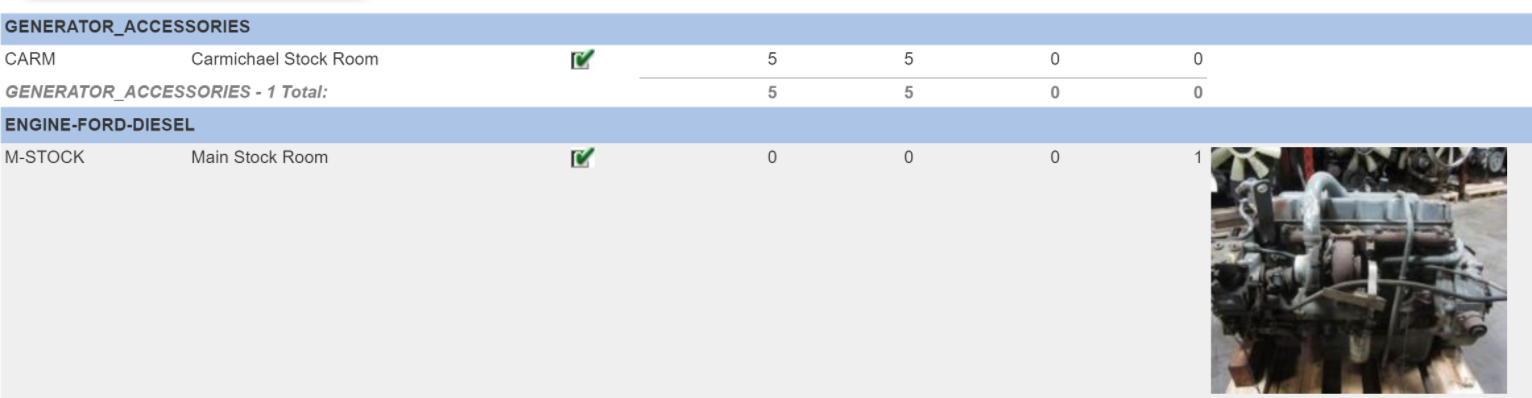
This process can be used throughout the Reporter to allow you to view full-size images in reports. Keep in mind that the data being added ("Part.Photo" in the example above) would need to be adjusted based on the module for which you are building the Report. If you need further assistance in using Custom Expressions to enlarge images in reports, please submit a request to our Support team.
Summary Reports
Summary Reports are used to display aggregations of data, such as sums, averages and counts. In the following example, a summary report was created that calculates both the number of incidents and total downtime for different Assets (or Asset Classifications).
Note: Pivot Reports are a special type of summary report that provide an expedient method for displaying aggregated data along two dimensions. For additional information on creating Pivot Reports, refer to the Pivot Report Tutorial article.
Let's create a summary report that provides the Total Count and Average Days to Close for closed Work Orders (by Priority):
-
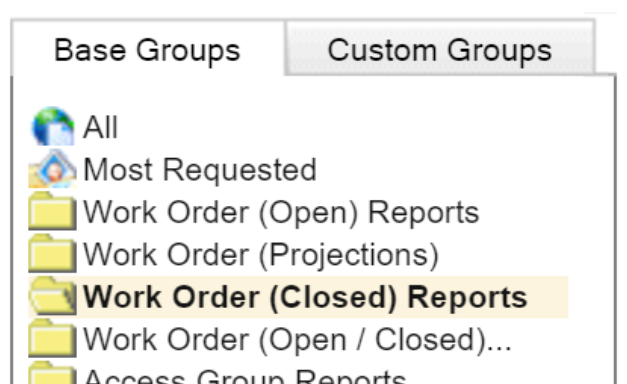
Open the Report Lookup and select the Work Order (Closed) Reports folder.
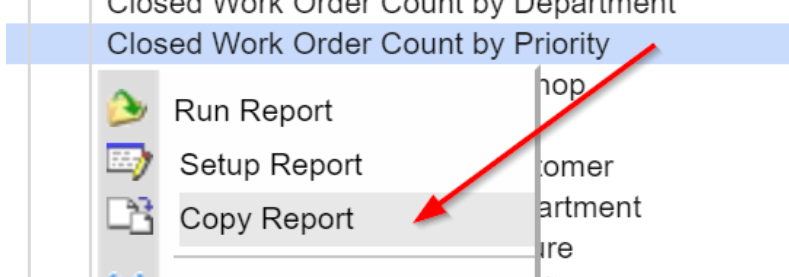
- Locate the Closed Work Order Count by Priority report and select Copy Report:
- The report will open in the Report Copy window. Enter a descriptive name for your report, such as the following:
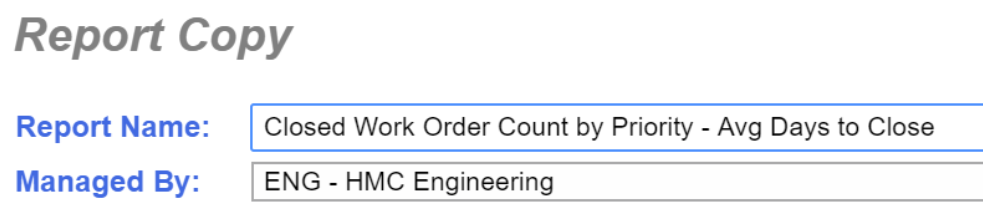
- Click on the Groups tab and then select the Custom Groups sub-tab. Place this report in your custom report folder:

- Click Apply when you are finished to return to the Report Lookup.
- Once back to the Report Lookup, locate your newly copied report and click Run Report. The report should be in your Custom Report Group and the Work Order (Closed) Reports folder.
- In the Report Criteria window, change the Target Date filter as desired. For example, you could include all Work Orders targeted in the current year. If it is early in the calendar year, you may wish to change this to a broader filter to ensure sufficient records are included:

Note: If you prefer to base your criteria on the Work Order Complete/Closed Date, you can modify the Report Criteria dialog to include this field. For more information on this capability, see the Intermediate Reporter Tutorial article.
- Click the Save button at the bottom of the Report Criteria dialog and then click Apply to run the report. The report will display in the Report Preview window:

- Click the Setup button to modify the setup for this report:

- The Report Setup window will display, showing the fields currently defined for the report in the Display fields list on the right.
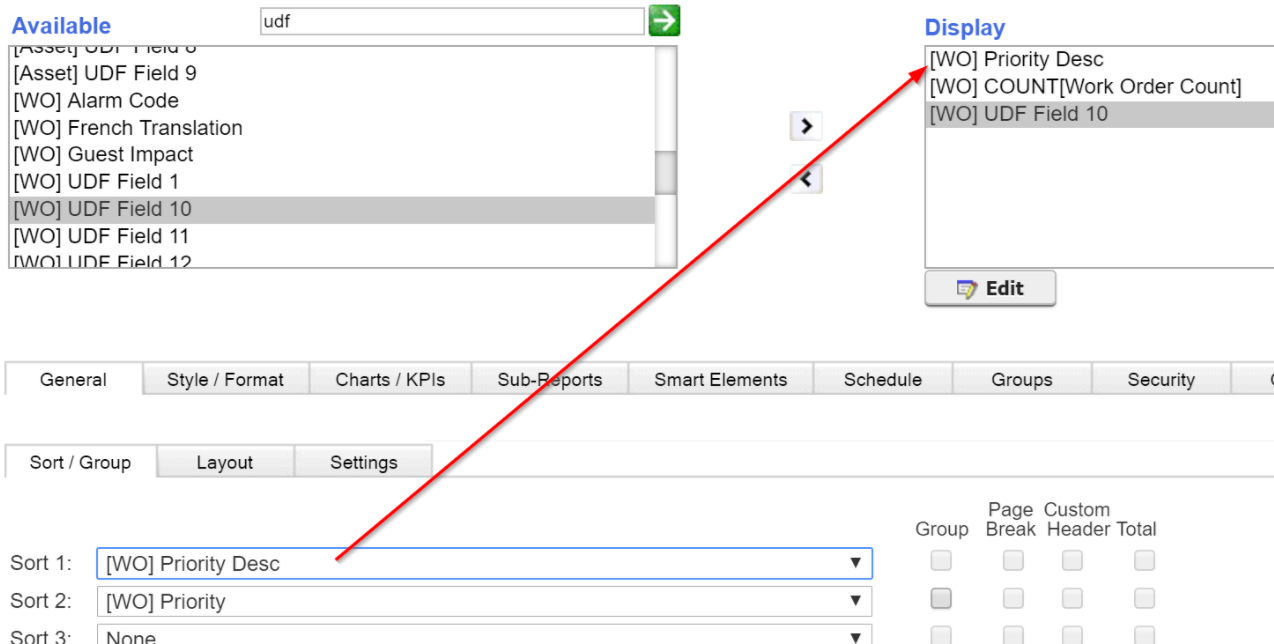
- [WO] Priority Desc and [WO] Count should already be listed, and should not need to be changed.
- Any additional fields, such as [WO] Priority should be removed. The list should appear as follows:

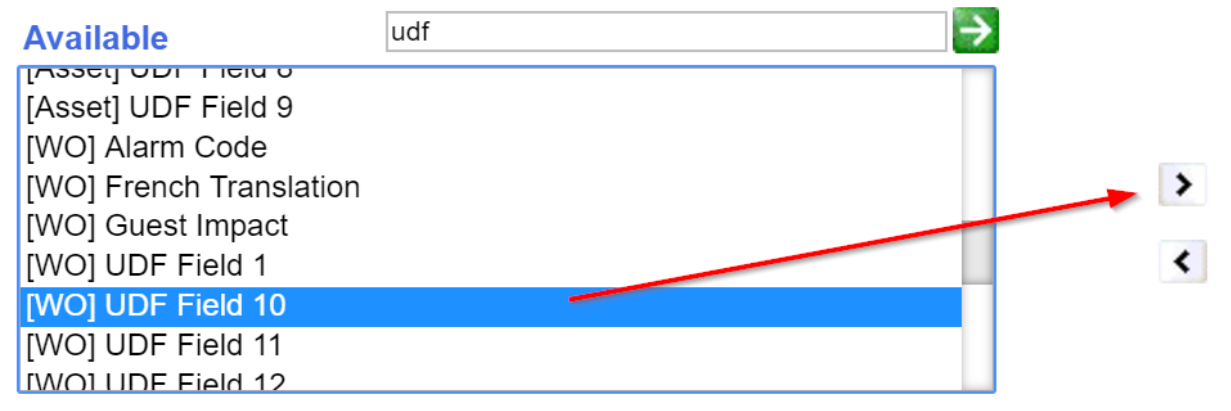
- Let's add a field to calculate the number of days the Work Order was open. Remember, to create the calculated field, you must specify a placeholder field on which the calculation will be specified. Select a field from the Available fields list to use as a placeholder. It must be a field that is not already listed in the Display fields list. For our example, you could use a UDF field such as [WO] UDF Field 10 and move it to the Display fields list:
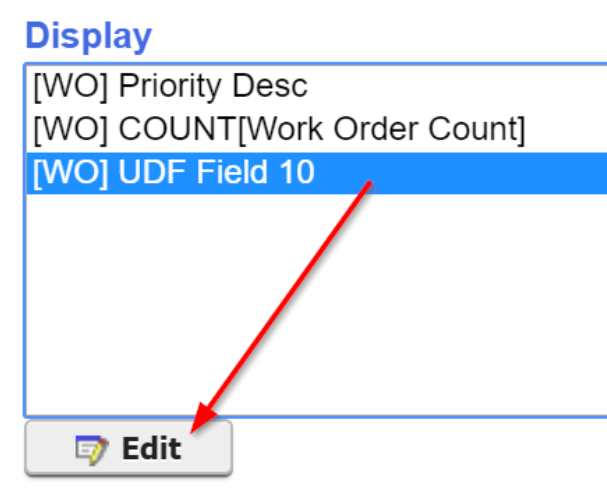
- Select the the placeholder field in the Display fields list and click Edit just below the field list. The Report Field Options dialog will display for this field:
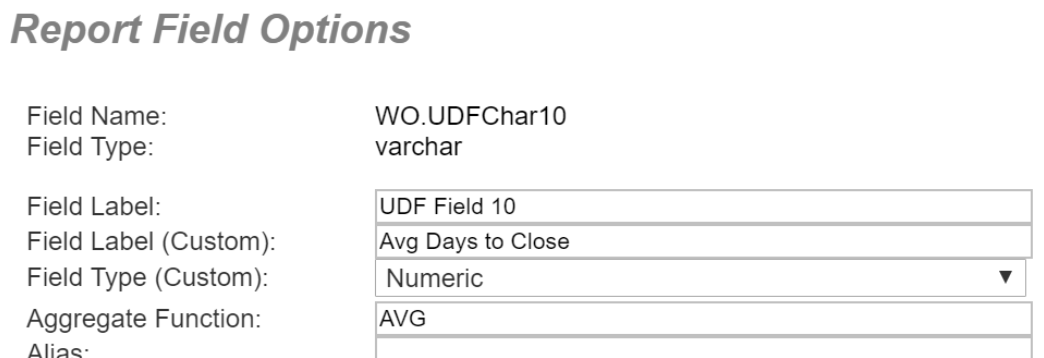
- Enter the desired label for the report column in the Field Label (Custom) prompt. In our example, you could enter "Avg Days to Close".
- Select the appropriate Field Type for your calculated result from the Field Type dropdown. In our example, you should select Numeric, as we will be calculating the number of days using this field.
- Enter the Aggregate Function. Since we wish to calculate the average days to complete, enter AVG for average.
- The Report Field Options should appear as follows:
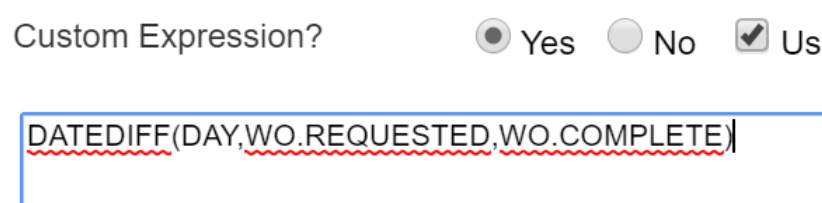
- Click the Yes control in the Custom Expression? field prompt, letting the system know that a custom calculation or expression will be used:

- In our example, we will create a Custom Expression that calculates the number of days between the date the Work Order was Requested and Completed using the DATEDIFF function. Enter DATEDIFF(DAY,WO.REQUESTED,WO.COMPLETE) into the Custom Expression Box:
- Click Apply to return to the Report Setup window.
- On Summary Reports, it is important to ensure that the Sort 1 field matches the first Display field listed. To ensure proper sorting, change the first sort field to Priority Desc:
- Remove any additional sort fields so that only the following is displayed:

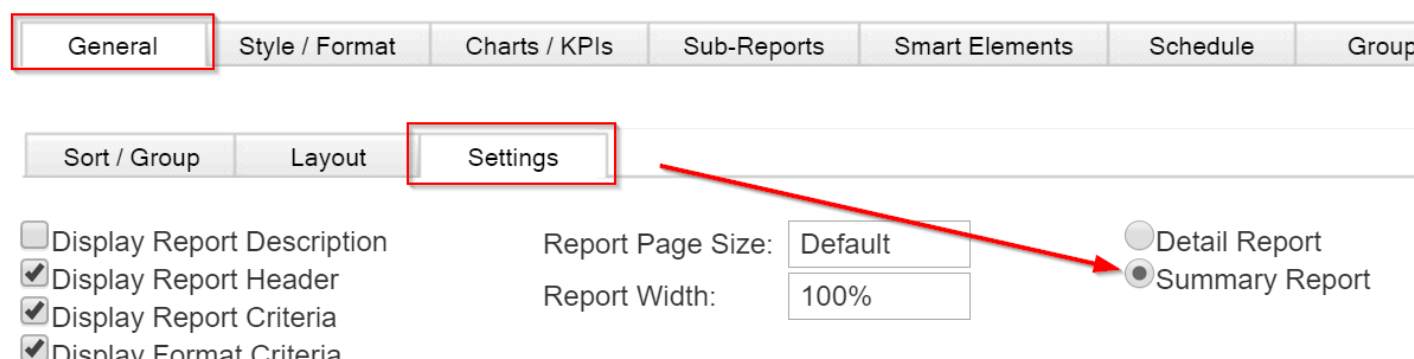
- Access the General>Settings sub-tab and verify that the report is specified as a Summary Report:
- To save your changes and view them in the report, click the Apply button at the bottom of the Report Setup window:
- The results might appear as follows:

Lesson 8: Work Order Statistics Reporting for SLA
Organizations can report on Work Order statistics across multiple business units. This means that Service Level Providers (including Cloud Hosted organizations that service multiple MC databases) have access to a group of reports that deliver SLA Work Order metrics.
Customers running a single database and those who utilize multiple, separate databases benefit from this feature by gaining Work Order reports configured to pull data across all their Repair Centers and Departments. Cloud Hosted customers pre-configured with multiple databases in a Master-Child setup get the additional benefit of being able to roll up pre-aggregated metrics from the child databases on a monthly basis.
As with normal Reporter functions, these standard, base reports can be copied and modified for your purposes, and you can use Report Criteria to view the data most pertinent to you. This includes allowing Service Level Providers to modify Report Criteria to include/preclude specific databases.
To access these new cross-business unit reports:
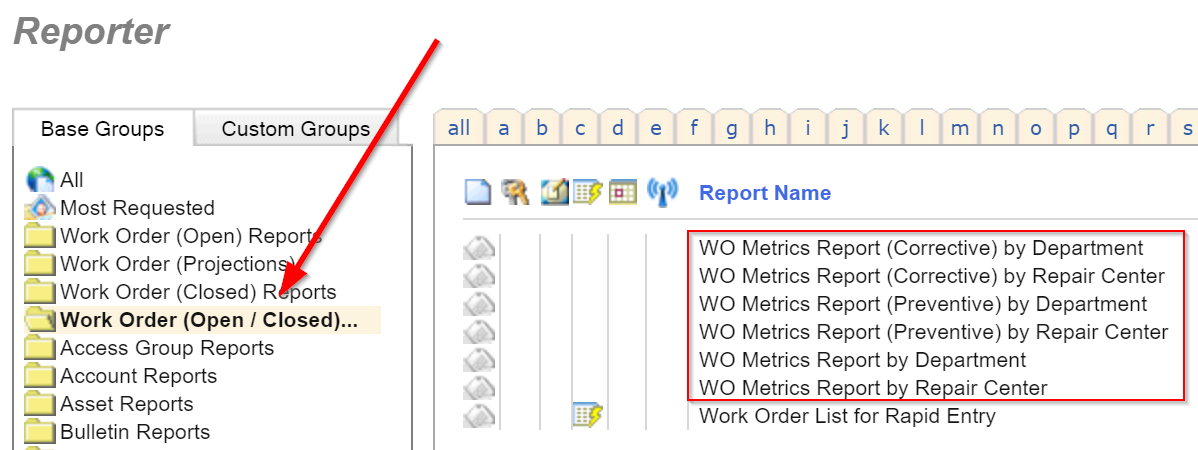
- Access the Reporter, and select the Work Order (Open/Closed)... report group.
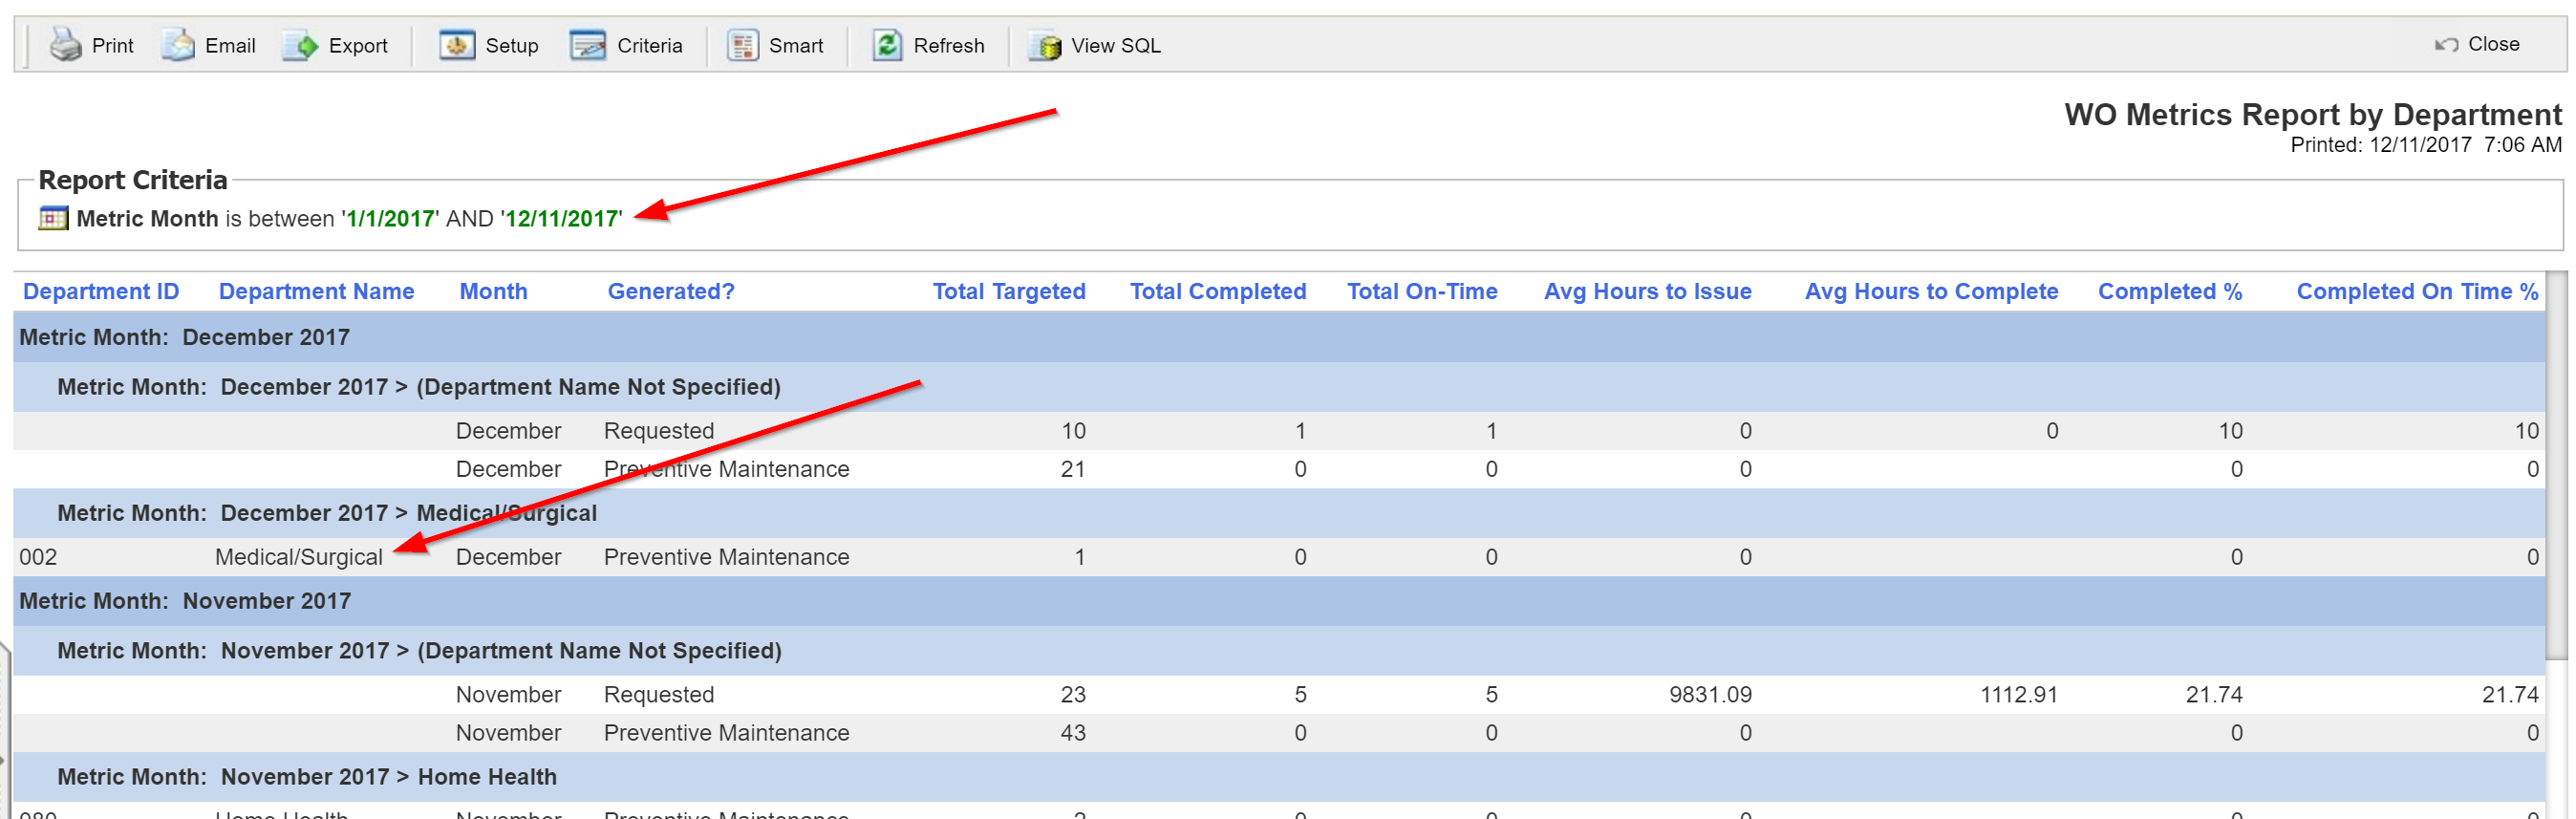
- The reports entitled "WO Metrics Report..." pull Work Order data from all business units. You will notice reports for Corrective and Predictive Work Orders, or both. These reports are organized either by Repair Center or Department:
- Here is a look at the WO Metrics Report by Department. As with all of these cross-business unit reports, this one displays Work Order data for each month. This particular report shows data for Corrective and Preventive Work Orders for each Department:
- Standard reporting practices can be used to modify these reports, and leverage them for your organization's benefit.
For complete reference information on the Maintenance Connection Reporter, refer to the Online Reporter Guide available from the Help Menu. The following additional Reporter Tutorials are available in our Knowledge Base:
- Reporter Tutorial: Basics: Overview, Copy Report, Report Groups, Report Preview Window, Report Criteria, Field Selection, Sorting/Grouping, Charting
- Reporter Tutorial: Intermediate: Conditional Formatting, Modify Report Criteria, Smart Report Popups, Smart Criteria and Scheduling Reports
- Reporter Tutorial: Pivot Reports: Instructions for creating Pivot Reports, an easy to use method for presenting aggregated or summary data